
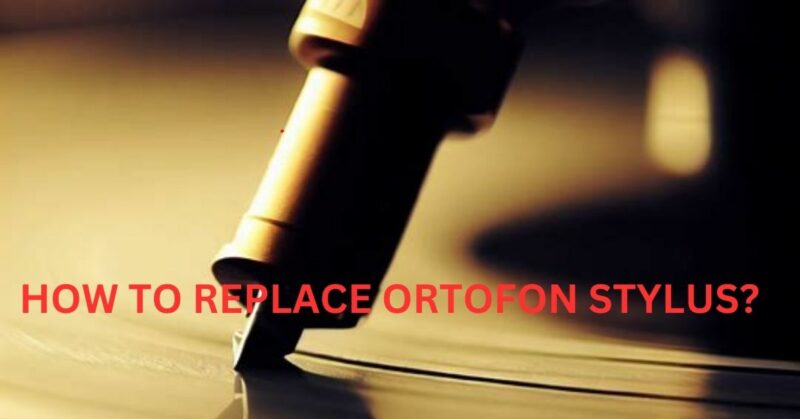
If you’re an avid vinyl enthusiast, you know that the quality of your turntable stylus can greatly impact the sound reproduction of your records. Ortofon, a renowned manufacturer of high-quality phono cartridges and styli, has earned a stellar reputation among audiophiles worldwide. Over time, stylus wear is inevitable, and it becomes necessary to replace it to maintain optimal audio performance. In this article, we will guide you through a step-by-step process on how to replace your Ortofon stylus, ensuring a seamless transition and prolonging the life of your vinyl collection.
1. Assessing the Need for Replacement:
Before diving into the replacement process, it’s essential to determine if your Ortofon stylus needs replacing. Over time, stylus wear can result in diminished audio quality, distorted sound, excessive surface noise, or skipping. Visual inspection under proper lighting can reveal signs of damage, such as a bent or broken cantilever, worn-down stylus tip, or debris buildup. If you notice any of these signs, it’s time to replace your Ortofon stylus.
2. Selecting the Correct Stylus:
Ortofon offers a wide range of stylus options tailored to various cartridge models. Identify the specific model of your Ortofon cartridge to ensure compatibility. This information is typically found on the cartridge body or the product packaging. Visit Ortofon’s official website or consult their customer support to identify the appropriate replacement stylus for your cartridge model.
3. Preparing for Replacement:
To ensure a successful replacement, gather the necessary tools: a clean, lint-free cloth, tweezers or needle-nose pliers, and the new Ortofon stylus. Ensure you’re working in a well-lit, dust-free environment to minimize the risk of damaging delicate components. If possible, ground yourself to prevent electrostatic discharge that could harm the stylus or cartridge.
4. Removing the Old Stylus:
Gently hold the cartridge body to stabilize it and avoid damaging the tonearm. Grasp the old stylus between your thumb and forefinger, near the base, and carefully pull it straight out from the front of the cartridge body. Avoid exerting excessive force or applying any lateral pressure, as this can lead to accidental damage.
5. Cleaning the Cartridge:
Using a clean, lint-free cloth, wipe the cartridge body to remove any dust or debris. Take extra care not to touch the exposed cantilever or the new stylus tip to avoid contamination or damage.
6. Attaching the New Stylus:
Hold the new Ortofon stylus between your thumb and forefinger, ensuring you’re only touching the rear end and avoiding contact with the diamond tip. Align the stylus’s rear end with the cartridge body, ensuring proper orientation by following the manufacturer’s guidelines or markings. Gently push the stylus into the cartridge body until you feel a secure connection. Avoid applying excessive pressure during this step.
7. Verifying Alignment:
Once the new stylus is attached, visually inspect its alignment. The stylus should be positioned squarely and symmetrically within the cartridge body. Use a magnifying glass if necessary to ensure it is correctly seated and aligned.
8. Testing and Calibration:
Before playing any records, it is crucial to perform a brief test to ensure proper installation. Carefully lower the tonearm onto a clean surface, such as a blank section of your turntable mat. Listen for any unusual sounds, skipping, or distortion. If everything sounds normal, proceed to calibrate the tracking force and anti-skate settings according to your turntable’s manufacturer instructions and the specifications provided by Ortofon for your specific cartridge model. Proper calibration ensures optimal tracking and prevents unnecessary wear on your new Ortofon stylus.
Replacing your Ortofon stylus is a straightforward process that can greatly enhance your vinyl listening experience. By following the step-by-step guide outlined above, you can ensure a seamless transition and maintain the integrity of your record collection. Remember to assess the need for replacement, select the correct stylus, prepare the necessary tools, remove the old stylus with care, clean the cartridge, attach the new stylus securely, verify alignment, and perform testing and calibration.
Taking the time to replace your stylus when necessary not only improves sound quality but also preserves the lifespan of your valuable vinyl records. It is essential to handle the delicate components with care, work in a clean environment, and follow the manufacturer’s guidelines to avoid any accidental damage. By investing in a high-quality Ortofon stylus and properly maintaining it, you can continue to enjoy the full richness and fidelity of your vinyl collection for years to come.
So, go ahead and embark on the journey of replacing your Ortofon stylus with confidence. Enjoy the immersive experience of vinyl playback, knowing that you have taken the necessary steps to ensure exceptional audio quality. Happy listening!