
Vintage record players hold a special place in the hearts of many audio enthusiasts, offering a nostalgic experience and a unique charm. However, due to age and wear, the needle (stylus) on these vintage players may need replacement. The good news is that in most cases, it is possible to replace the needle on a vintage record player, rejuvenating its playback capabilities. In this article, we will explore the process of replacing the needle on a vintage record player, guiding you through the steps to ensure successful restoration and continued enjoyment of your cherished vinyl collection.
- Determine the Needle Compatibility: Before replacing the needle, it is crucial to ensure compatibility between the vintage record player and the replacement needle. Vintage record players often use a specific cartridge type and mounting style. Research the make and model of your vintage record player to determine the cartridge and stylus type it employs. Cross-reference this information with the available replacement needles on the market to find a suitable match. It is advisable to consult the record player’s manual, seek guidance from vintage audio forums, or contact specialized retailers to ensure compatibility.
- Research and Source a Replacement Needle: Once you have identified the cartridge and stylus type required for your vintage record player, search for a suitable replacement needle. Numerous specialized retailers, online platforms, and vintage audio enthusiasts offer a wide range of replacement needles for vintage record players. Ensure that the replacement needle matches the specifications of the original needle in terms of shape, size, and compatibility. It may be helpful to consult experts or seek recommendations from vintage audio communities to find reputable sources for replacement needles.
- Prepare for Replacement: Before proceeding with the needle replacement, gather the necessary tools for the task. Typical tools required include a pair of fine-tipped tweezers, a stylus brush, and potentially a small screwdriver or Allen wrench (depending on the specific cartridge and stylus design). Ensure you have a clean and well-lit workspace to facilitate the replacement process and minimize the risk of damaging delicate components.
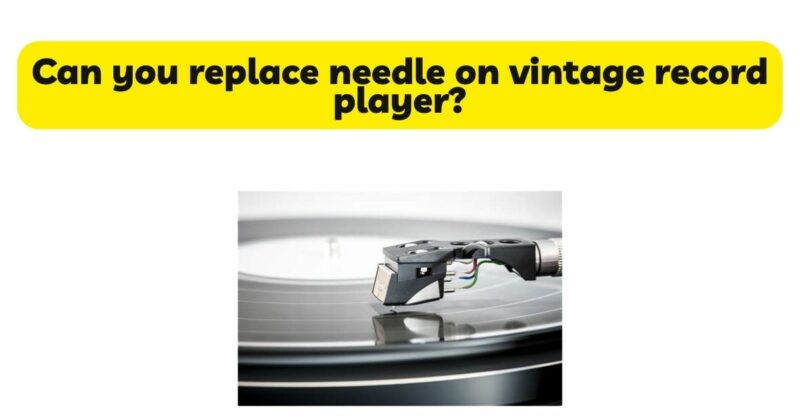
- Safely Remove the Old Needle: Begin by carefully removing the old needle from the cartridge. Some vintage record players have a removable headshell that allows for easy needle replacement. If your record player has a removable headshell, detach it by loosening the screws or using the release mechanism provided. Once the headshell is separated, you can access the cartridge more easily. For record players without a removable headshell, the cartridge may be fixed directly onto the tonearm. In this case, gently hold the cartridge and use fine-tipped tweezers to grasp the old needle by the plastic or metal housing. Avoid touching the delicate stylus tip with your fingers.
- Install the Replacement Needle: Take the replacement needle and align it correctly with the cartridge. Some replacement needles have a specific orientation or alignment guide to ensure proper installation. Follow the manufacturer’s instructions or any alignment marks on the needle to align it correctly. Carefully insert the needle into the cartridge, ensuring it fits snugly and securely. Depending on the cartridge design, you may need to tighten screws or use an Allen wrench to secure the needle in place. Double-check that the replacement needle is firmly installed to avoid any accidental dislodging during playback.
- Check Tracking Force and Alignment: Once the replacement needle is installed, it is crucial to verify the tracking force and alignment. Proper tracking force ensures accurate playback and minimizes the risk of damaging your records. Refer to the manufacturer’s guidelines or the record player’s manual to determine the recommended tracking force range for the specific replacement needle. Adjust the counterweight or tracking force control on your vintage record player accordingly to achieve the correct tracking force. Additionally, ensure that the alignment of the replacement needle is aligned properly with the record grooves. If necessary, consult the record player’s manual or seek guidance from vintage audio experts to ensure optimal alignment.
- Perform a Test Playback: After completing the replacement process, perform a test playback to verify the performance of the new needle. Select a well-maintained record and gently lower the needle onto the record surface. Observe the playback quality for any signs of skipping, distortion, or excessive surface noise. Listen for balanced audio reproduction across the frequency spectrum. If any issues are detected, recheck the installation, tracking force, and alignment. Fine-tuning may be necessary to achieve optimal playback performance.
- Regular Maintenance and Care: To extend the lifespan of your replacement needle and maintain optimal audio performance, regular maintenance and care are essential. Clean the needle regularly using a stylus brush or specialized cleaning solution designed for stylus maintenance. Avoid touching the needle with your fingers, as oils and debris can impact performance. Additionally, maintain clean records and use anti-static brushes before playback to minimize dust and debris accumulation on the needle.
Conclusion: Replacing the needle on a vintage record player allows for continued enjoyment of your vinyl collection while preserving the unique charm of these classic audio devices. By researching the correct replacement needle, preparing the necessary tools, safely removing the old needle, and installing the replacement needle with care, you can restore the playback capabilities of your vintage record player. Ensure proper tracking force, alignment, and perform a test playback to verify optimal performance. With regular maintenance and care, your replacement needle will provide years of faithful service, allowing you to relish the warmth and authenticity of vinyl recordings on your vintage record player.