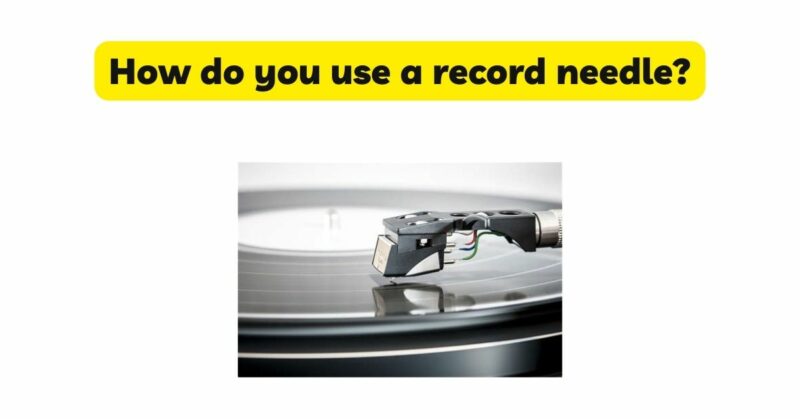
Using a record needle, also known as a stylus, is an essential skill for any vinyl enthusiast. The proper handling and care of the needle are crucial not only for preserving the longevity of the turntable but also for ensuring optimal sound quality. In this article, we will provide a detailed guide on how to effectively and safely use a record needle, covering everything from setup and alignment to maintenance and troubleshooting.
- Preparing the Turntable: Before using the record needle, it’s important to ensure that the turntable is set up correctly. Follow these steps to prepare the turntable for optimal performance:
a. Leveling: Ensure that the turntable is placed on a stable, level surface to prevent any unwanted vibrations or skipping during playback.
b. Platter Cleaning: Clean the turntable platter using a soft, lint-free cloth to remove any dust or debris that may affect the record and needle.
c. Tonearm Alignment: Check the tonearm alignment and adjust it according to the manufacturer’s instructions to ensure proper tracking and accurate playback.
- Handling the Record Needle: Proper handling of the record needle is crucial to avoid damage and ensure accurate playback. Here are some essential guidelines to follow:
a. Clean Hands: Before handling the record needle, wash your hands thoroughly to remove any dirt, oil, or debris that could transfer onto the needle or record.
b. Gentle Touch: When handling the needle, exercise caution and use a gentle touch. Avoid touching the delicate needle tip to prevent bending or damaging it.
c. Holding the Tonearm: When placing or removing the needle, hold the tonearm firmly but gently. Avoid excessive force or sudden movements that could cause the needle to slip or hit the record surface.
- Placing the Needle on the Record: Properly placing the needle on the record is crucial for accurate playback and avoiding damage. Follow these steps to ensure a smooth and safe needle placement:
a. Cueing Lever: If your turntable has a cueing lever, use it to gently lift the tonearm and position it over the desired starting point on the record.
b. Gentle Lowering: Lower the tonearm slowly and steadily onto the record surface, allowing the needle to make contact with the grooves. Avoid dropping the tonearm abruptly, as this can cause damage to the needle and record.
c. Playing Position: Ensure that the needle is properly aligned within the grooves. If the needle is not tracking properly or seems to skip, gently lift the tonearm, realign it, and try again.
- Needle Maintenance and Cleaning: Regular maintenance and cleaning of the record needle are crucial for optimal sound quality and longevity. Follow these steps to clean and care for your record needle:
a. Brush Cleaning: Use a specialized record brush or a soft brush specifically designed for cleaning record needles. Gently brush the needle tip in a back-to-front motion to remove any dust or debris that may have accumulated.
b. Stylus Cleaner: Alternatively, you can use a stylus cleaner solution designed to dissolve dirt and debris from the needle tip. Follow the manufacturer’s instructions and apply the solution carefully using a dedicated brush or applicator.
c. Avoiding Excessive Pressure: When cleaning the needle, avoid applying excessive pressure or pushing the brush too forcefully against the needle. Gentle and careful movements are key to prevent any damage.
- Troubleshooting Common Issues: Even with proper care, issues with the record needle may occasionally arise. Here are a few common troubleshooting tips for some typical problems:
a. Needle Skipping: If the needle is skipping or mistracking, check the alignment of the tonearm and ensure that it is properly balanced. Additionally, check the condition of the record for any visible scratches or warps that could be causing playback issues.
b. Distorted Sound: If you notice distortion or poor sound quality, first ensure that the record is clean and free from dust or debris. If the problem persists, it may be a sign that the needle needs replacement or realignment.
c. Excessive Surface Noise: Excessive surface noise can be caused by a variety of factors, including a worn-out or dirty needle, a poorly maintained record, or an issue with the turntable setup. Clean the needle and record, check the turntable setup, and ensure that the cartridge and stylus are properly aligned.
Conclusion: Using a record needle requires attention to detail, gentle handling, and regular maintenance. By following the steps outlined in this comprehensive guide, you can ensure optimal sound quality, accurate playback, and prolonged lifespan for both the needle and your cherished vinyl records. Mastering the art of using a record needle not only enhances your listening experience but also preserves the magic and nostalgia of vinyl playback for years to come.


