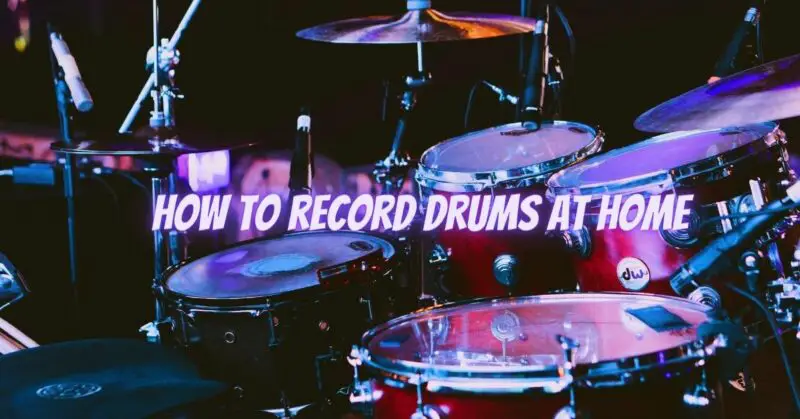
Recording drums at home can be a rewarding experience that allows you to capture the power and energy of your drumming. While it may seem challenging, with the right equipment, techniques, and a bit of patience, you can achieve professional-sounding drum recordings in the comfort of your own home. In this article, we will guide you through the essential steps and techniques for recording drums at home, helping you capture the true essence of your drumming prowess.
- Setting Up Your Recording Space: Creating a suitable recording environment is crucial for capturing high-quality drum recordings at home. Consider the following:
a. Room Selection: Choose a room that provides adequate space and favorable acoustics. Rooms with minimal echo or reverb are ideal for cleaner drum recordings. If the room has unwanted reflections, consider using blankets, curtains, or acoustic panels to minimize these effects.
b. Drum Placement: Position your drum kit in the room, taking into account microphone placement and minimizing unwanted resonances. Experiment with different placements to find the sweet spot that captures the desired sound.
c. Soundproofing: If possible, address any sound leakage issues by adding soundproofing materials such as door sweeps, window insulation, or acoustic baffles. This helps to minimize outside noise interference and improves the recording quality.
- Selecting the Right Microphones: Choosing the appropriate microphones is essential for capturing the nuances and power of your drum kit. Here are some commonly used microphones for recording drums:
a. Kick Drum: Use a dynamic microphone designed for kick drums to capture the low-frequency punch and impact. Place it just inside or outside the drum’s sound hole.
b. Snare Drum: Employ a dynamic microphone with high SPL handling capabilities positioned above or slightly to the side of the snare drum, aimed towards the center of the drumhead.
c. Toms: Use dynamic microphones or small-diaphragm condenser microphones to capture the toms’ sound. Place them just above the rims, angled towards the center of each drumhead.
d. Overhead Cymbals: Utilize a pair of small-diaphragm condenser microphones or stereo overhead microphones placed above the drum kit, capturing the overall stereo image of the cymbals and the kit.
e. Room Microphones: Consider adding a pair of room microphones strategically placed in the room to capture the natural ambiance and depth of the drum sound.
- Mic Placement Techniques: Proper microphone placement is crucial for capturing a balanced and accurate representation of your drum sound. Consider the following techniques:
a. Kick Drum: Position the kick drum microphone just inside or outside the drum’s sound hole, a few inches away from the drumhead. Experiment with distance and placement to achieve the desired balance of attack and low-end.
b. Snare Drum: Place the snare drum microphone above or slightly to the side of the snare drum, around 1-2 inches above the drumhead. Adjust the angle to capture the desired balance of snare wires and drum attack.
c. Toms: Position tom microphones just above the rims, angled towards the center of each drumhead. Experiment with distance and placement to capture the desired tonal characteristics of each tom.
d. Overhead Cymbals: Suspend overhead microphones a few feet above the drum kit, ensuring an equal distance from the center of the snare drum. Experiment with height and spacing to capture a balanced stereo image of the cymbals and the entire drum kit.
e. Room Microphones: Place room microphones at a distance from the drum kit to capture the natural ambience and spaciousness of the room. Experiment with placement to find the sweet spot that complements your desired drum sound.
- Recording Techniques and Tips: To capture the best drum recordings at home, consider the following techniques and tips:
a. Preamp Selection: Use high-quality microphone preamps to capture the full potential of your microphones and maintain the integrity of the recorded sound.
b. Gain Staging: Pay attention to gain staging to ensure optimal signal levels and avoid clipping. Set appropriate levels at each stage, from the microphone preamps to the recording interface or mixer.
c. Multiple Takes: Record multiple takes of each drum part to give yourself options during the mixing stage. This allows you to choose the best performances and mix them together for the desired drum sound.
d. Mixing Considerations: During the mixing stage, use EQ, compression, and other processing techniques to shape the drum sound. Experiment with different settings to achieve a balanced and polished drum mix.
e. Experiment and Have Fun: Recording drums at home provides an opportunity for experimentation and creativity. Don’t be afraid to try different microphone placements, processing techniques, and styles to achieve your desired drum sound.
Conclusion: Recording drums at home is a rewarding endeavor that allows you to capture and share your drumming skills. By setting up a suitable recording environment, selecting the right microphones, paying attention to mic placement techniques, and following proper recording techniques and tips, you can achieve high-quality drum recordings in the comfort of your own home. Remember to experiment, listen critically, and have fun during the recording and mixing process. With practice and refinement, you’ll be able to capture the true essence of your drumming artistry and create professional-sounding drum recordings.


