
When setting up a turntable, one crucial step is properly connecting the ground wire to the receiver. The ground wire plays a vital role in reducing unwanted electrical hum and noise from your turntable’s audio signal. However, for newcomers to vinyl, the process of connecting the ground wire may seem unfamiliar. In this article, we will provide a comprehensive guide on how to connect the ground wire to a receiver, ensuring optimal audio performance and minimizing interference.
Step 1: Gather the Required Materials: Before starting, make sure you have the necessary materials:
- Turntable with a ground wire
- Receiver or amplifier with a designated ground terminal
- RCA cables (if required)
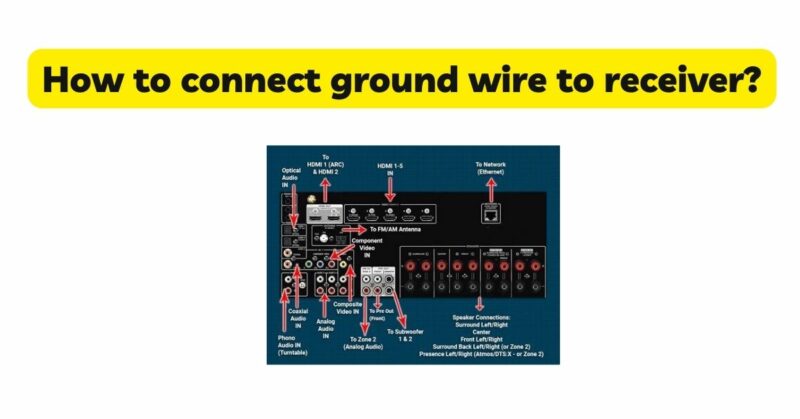
Step 2: Locate the Ground Terminal: Identify the ground terminal on your receiver or amplifier. It is usually labeled as “GND” or “Ground” and may be located near the phono input or on the rear panel of the device.
Step 3: Power Off and Disconnect: Before making any connections, ensure that both your turntable and receiver are powered off and unplugged from the electrical outlet. This step prevents accidental damage and ensures your safety.
Step 4: Prepare the Ground Wire: Take the ground wire from your turntable and remove any protective covering or insulation from the end. You should have a bare wire exposed, ready for connection.
Step 5: Connect the Ground Wire: Insert the exposed end of the ground wire into the ground terminal on your receiver. In most cases, the ground terminal will have a screw or binding post. Loosen the screw or open the binding post to create a gap, and then insert the bare wire into the gap. Tighten the screw or secure the binding post to ensure a firm connection.
Step 6: Verify the Connection: Once the ground wire is securely connected, double-check to ensure that it is tightly fastened. Gently tug on the wire to confirm that it is securely attached and won’t come loose during use.
Step 7: Reconnect and Power On: After connecting the ground wire, reassemble any disassembled components, such as the turntable and receiver. Plug them back into the power outlets and power them on. Take care to follow the manufacturer’s instructions for powering on your equipment.
Step 8: Test for Proper Grounding: Now that the ground wire is connected, play a vinyl record on your turntable. Listen for any noticeable reduction in hum or noise compared to when the ground wire was not connected. If the grounding is successful, you should experience cleaner and more accurate audio playback.
Step 9: Troubleshooting: If you still experience hum or noise after connecting the ground wire, there may be other factors contributing to the issue. Try the following troubleshooting steps:
- Ensure that the ground wire is securely connected at both ends.
- Check that the turntable and receiver are properly grounded to a reliable electrical outlet.
- Verify that all cables, including the RCA cables, are securely connected and free from damage.
- Consult the user manuals for your turntable and receiver for any specific troubleshooting advice.
Conclusion: Connecting the ground wire to a receiver is an essential step in setting up your turntable and ensuring optimal audio performance. By following the step-by-step guide provided above, you can easily connect the ground wire to the designated terminal on your receiver. Remember to power off and disconnect all equipment before making connections, and always consult the user manuals for your specific turntable and receiver. With a properly connected ground wire, you’ll enjoy cleaner audio playback and a more enjoyable vinyl listening experience.
