
We’ve shown you how to make your own ultrasonic cleaning solution, told you what to watch out for during ultrasonic cleaning, and now we’re going to optimise your cleaning process by teaching you how to filter your ultrasonic cleaning fluid!
If you’ve done some of your own research into this topic, you may find that the rigs you see online might be fairly intimidating to set up and use. You might not even know where to start! Worry not, because we’re here to help you get started with setting up a filtration system right so you can make sure that your record cleaning process is as good as can be.
Why Filter Ultrasonic Cleaning Fluid in the First Place?
For each record you spin through the ultrasonic cleaning solution bath, your bath accumulates more and more dirt from their crevices and grooves. From dust to oil to gunk that’s been trapped in older records, all these will find their way into the solution as the tiny vapor bubbles that the cavitation/ultrasonic cleaning process generates beat them out of the record. However, as more of this gunk falls into the solution, the chance of them finding another home in your record also increases.
Some ultrasonic record cleaning fans simply advise that you just throw out the solution after a few rounds of cleaning, but we’ve found that this might be fairly wasteful, especially if you find it hard to get a hold of the right cleaning supplies for your vinyl records. Getting an ultrasonic filtration system set up will help you ensure that you can prolong the use of each ultrasonic bath and save on money spent on cleaning solutions in the future.
Of course, filtering your fluid isn’t going to make it fully clean and infinitely reusable. While filtration systems will remove the larger dirt particles from the overall solution, smaller substances that can dissolve into your solution might stick around and compromise its efficacy. The common recommendation is that you replace the cleaning solution after cleaning 25 records. We recommend using filtered solutions for up to one or two more batches of 25 before throwing out the water entirely.
How to Set Up the Ultrasonic Cleaning Solution Filtration System
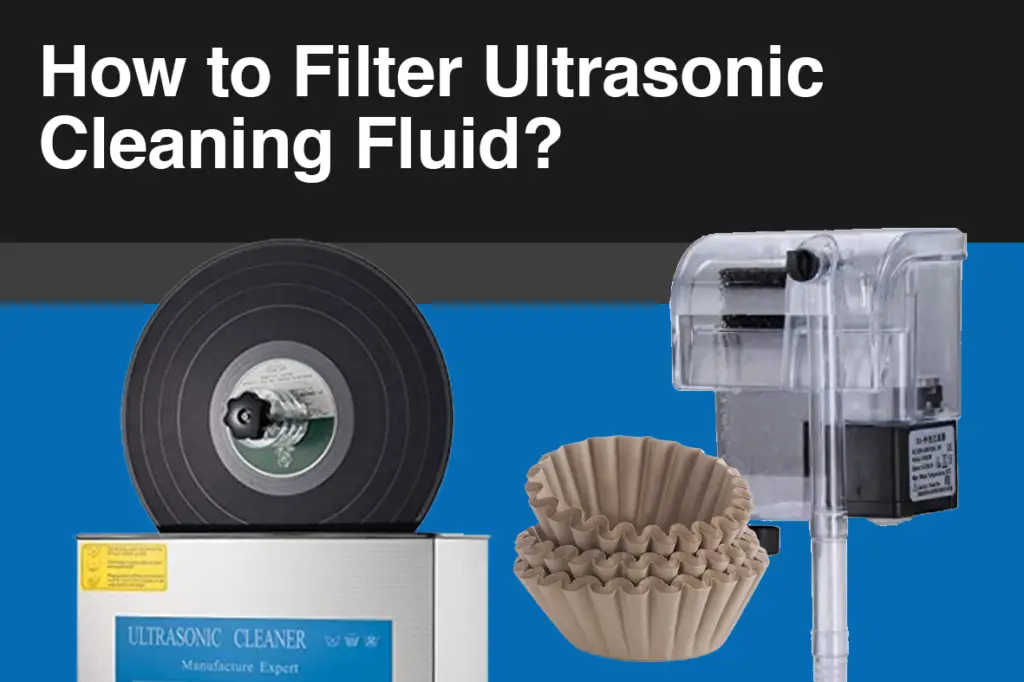
There are 2 methods to filter your cleaning solution:
- Making a DIY rig with filter paper (e.g. coffee filters)
- Attaching a Modular Water Filter
Method #1: DIY Filter Method
This one’s fairly simple despite the DIY part of it. All you’ll need to do is to purchase some form of filter paper or filter that’s able to filter out larger particles. Coffee filters are especially good in this regard, but you could purchase other filter sheets as well if they can manage filtering larger particles. The Tupkee 600 Count Coffee Filters work pretty good in that regard.
Once you have the filters on hand, simply stack 2 of them together and pour the used ultrasonic cleaning bath through the filter and into another container before cycling them back into the ultrasonic machine reservoir. This method is easy to execute, but does interrupt the cleaning process as you wait for the solution to pass through the filter paper. The next method, however, filters your water in tandem with the vinyl record cleaning process.
Method #2: Attaching a Modular Water Filter
This requires purchasing a separate water filter of your own, and costs a bit more than just using filter paper. The options for ultrasonic water filters range from cheaper aquarium filters you can buy from a pet store to dedicated rigs built to accommodate ultrasonic cleaners and motors that rotate vinyl records through them. Personally, I think that they all get the job done fairly well, but I feel that most people would rather trust a filter that looks more professional and well-designed than an aquarium filter. For this method, we recommend the PULACO Hang On Filter. It’s fairly cheap and simple enough to start up, and can be easily attached to open ultrasonic cleaning baths like the type you see in the Groove Clean machine.
There’s not much to this method other than simply attaching or mounting your filter to your ultrasonic cleaning machine. One thing to consider is that you will need to connect your filter to another socket as well since it requires power to run; also meaning that it does require a little bit more power to run your cleaning rig compared to the analogue paper filter method.
You can check out what a water filter built specially for an ultrasonic cleaner looks like in the following video.
We also recommend articles such as this one to get a better idea of the kind of maintenance you’ll have to carry out when using a water filter machine. Water filters make the whole filtering process more convenient, but6 you will have to make sure to clean and dry them periodically to avoid bacteria or mould build up inside as the filter accumulates dirt from records. Otherwise, you do run the risk of cycling in the same dirt into subsequent washes of future records.
Final Words
And that’s all you need to know about filtering your ultrasonic cleaning fluid! It’s a fairly straightforward and simple process, and honestly saves you a lot of time spent making more cleaning fluid or even money spent to purchase more. Collecting records is a pretty pricey hobby on its own, so finding ways to save where you can helps make this hobby more manageable!
If you’ve got some tips and tricks to filtering cleaning fluid in ultrasonic baths, do feel free to share them in the comments!